How to create a product with variants and options in Shopify and link them to merchOne?
Note: For an improved user experience, we strongly suggest you use the method detailed in How to create and sync a product to Shopify.
Prints on different materials (acrylic, metal, glass) or with different finishes (framed, frameless) are considered different products on our platform, and we highly recommend creating them separately. However, there are specific cases when you may need to consolidate products from multiple materials/ finishes.
Please remember that a single product can have up to 3 options. The criteria for these options can vary from product to product, including attributes such as size, color, style, weight, finish, or material.
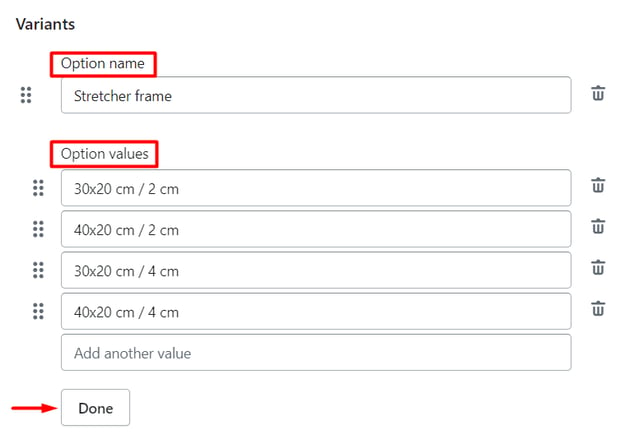
The example below illustrates how you can create a canvas product with two stretched frame options: 2cm & 4 cm.
- Create each product as described here, to publish only the Parent Product.
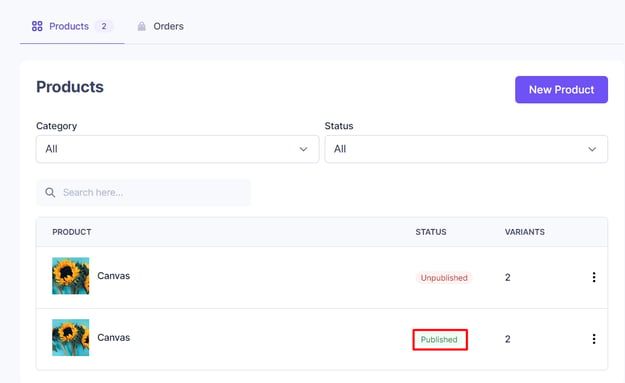
- Go to your Shopify Dashboard and access the product by clicking on the Products tab on the left side of the page.
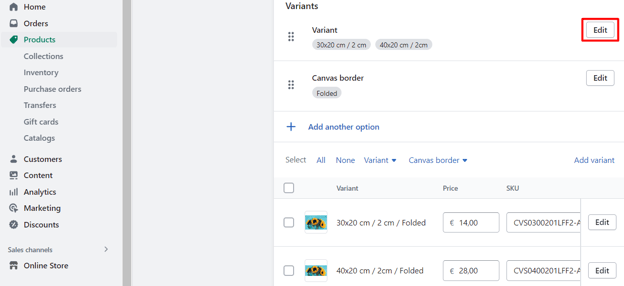
- Scroll down to the Variants section and click the Edit button.
- Adjust the option name in the Values field, enter the product options you want to offer, and click Done.
- Scroll down to see the newly created variants.
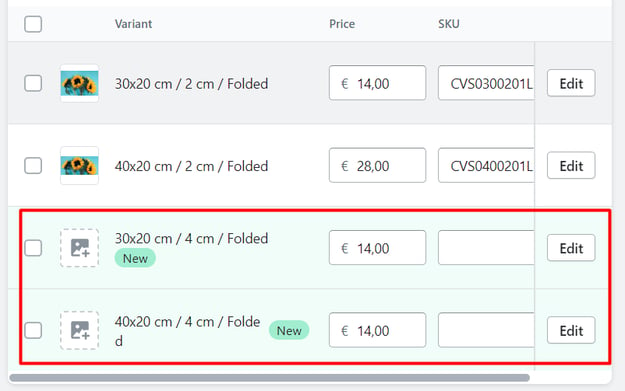
You must copy each SKU (Stock Keeping Unit) from the unpublished product created in the merchOne account and paste it next to the corresponding variant on Shopify. In the upcoming steps, we will guide you through the process. - You can find the SKU by clicking the three dots and selecting Edit Product Information.

- Click the Copy SKU clipboard icon. You will see the following message: "SKU was copied to the clipboard."
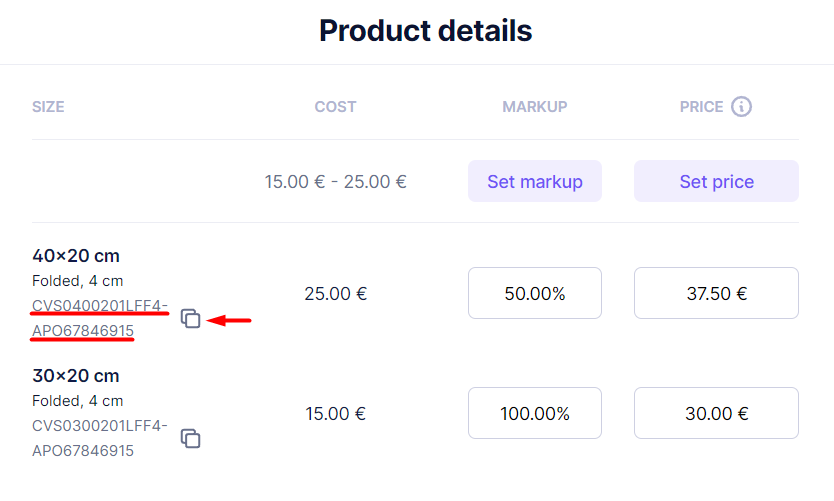
Note: The SKU is a unique code businesses use to track their inventory. It is helpful in Shopify because it allows you to create products with multiple variations based on color and material. You can do that by creating a parent product and using different SKUs for each variation.
8. Insert the SKU according to each variant.

9. Make sure you added the right SKUs and adjusted the prices. When you're done, click the Save button.